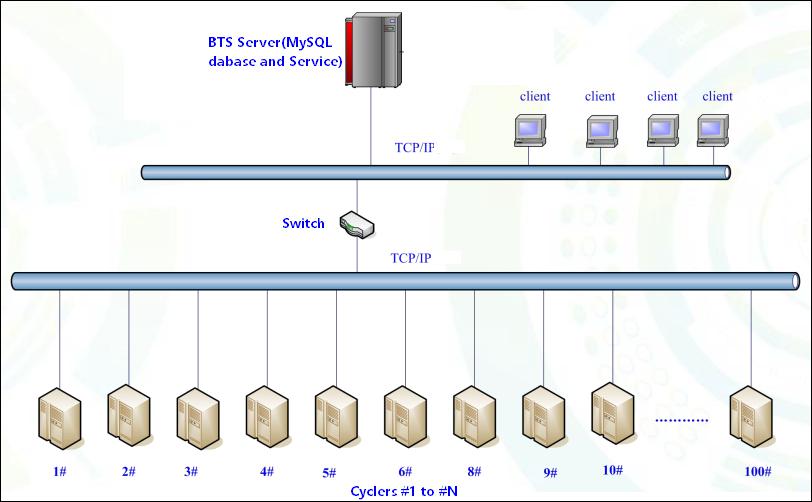
Neware battery test system is designed as C/S architecture, testers and computers communicate with each via TCP/IP, so it’s possible for customers to setup Neware testers distributively in the enterprise LAN, especially when there are many channels or users of different departments want to have access the channels from different computers or locations.
The Neware BTS system architecture/diagram shows as following.
#1. Setup the server
Use a good performance computer as server computer, for long-term tests and data storage, hard drives in Raid mode is strongly suggested instead of one single hard drive.
System should be 64bit Win7/10 or server systems such as Windows server 2008 or higher version.
Download the newest software from following address,
https://newarebattery.com//softwares/NEWARE_BTS7.6.0_2017_08_04_En.exe.
Right click on above installation package and run it as administrator.
Install everything it popups(VC++ library, Client and Server), we install client on the server is to to be we can have access all the testers on server, this will make things easier.
Set the local Ethernet connection TCP/IP V4 setting as following.
IP address: 192.168.1.250
Subnet mask: 255.255.255.0
Default GW: 192.168.1.1
If your LAN network segment is not 192.168.1.x, that’s also okay for you to set up the IP address as you want, as long as the mid machine is setup correctly as following. If not, please use the buttons next to the small screen to adjust.
GET IP METHOD: MANUAL
LP: 192.168.1.x, same segment as server IP and this LP should be the only one available in your LAN.
SP: Same as your server computer IPV4 IP address, which means computer is the server of the mid machine(and testers).
GW: Same as the Gateway of your server computer IP setting.
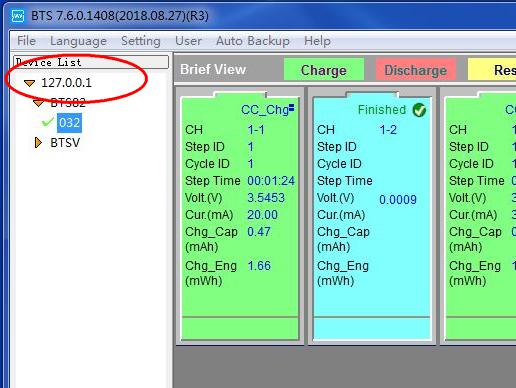
Start up the software(BTS7.6.0), power on the testers. If you can see node like BTS81/82 under the IP address 127.0.0.1, which means the connection works, and both the server, database and client are all working well. Then you are ready to rock!
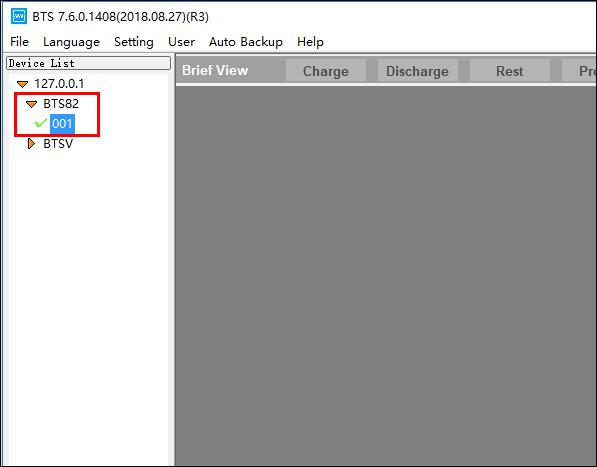
Login in the software from menu ‘user/Login’ with name and password admin/neware.
Right click on the software gray area and choose reset map.
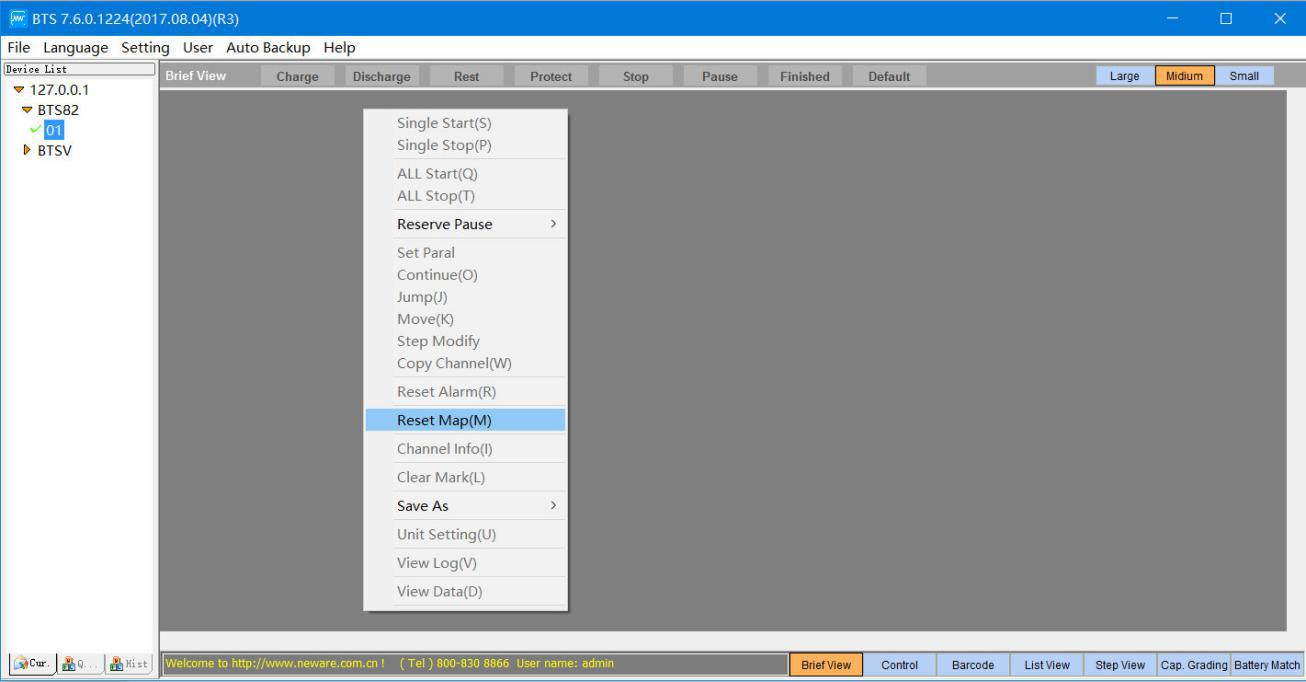
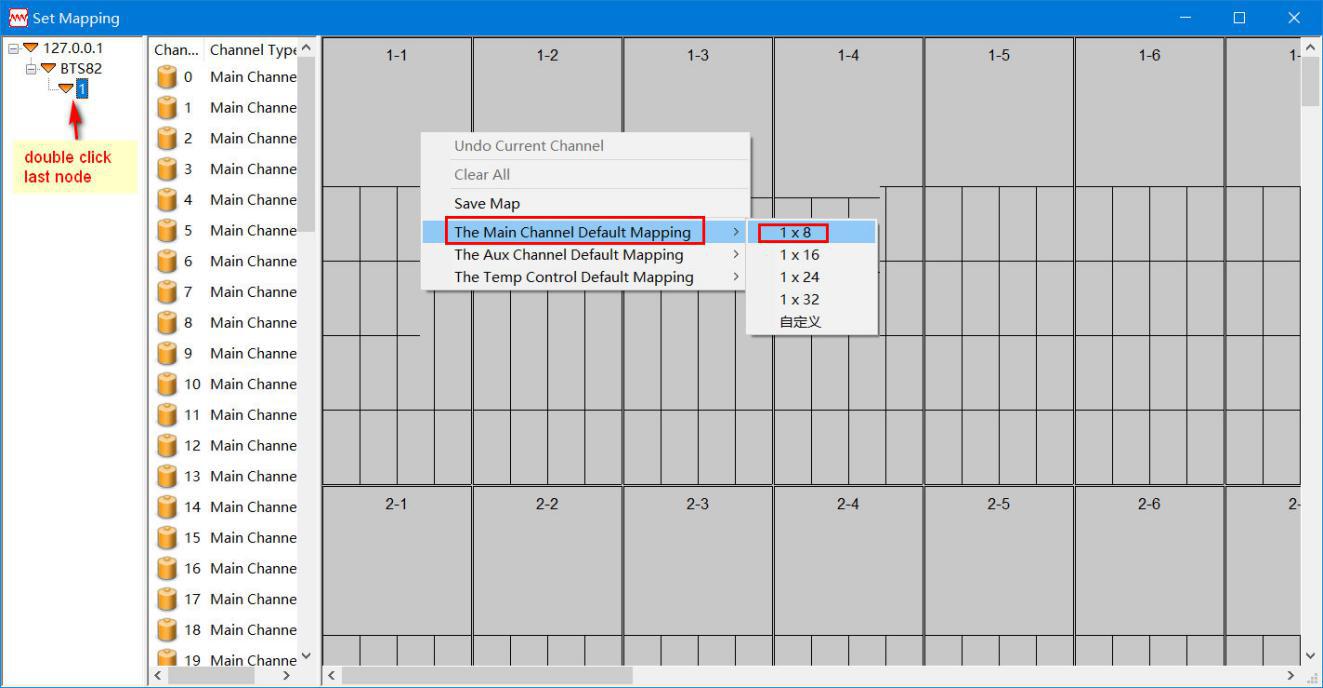
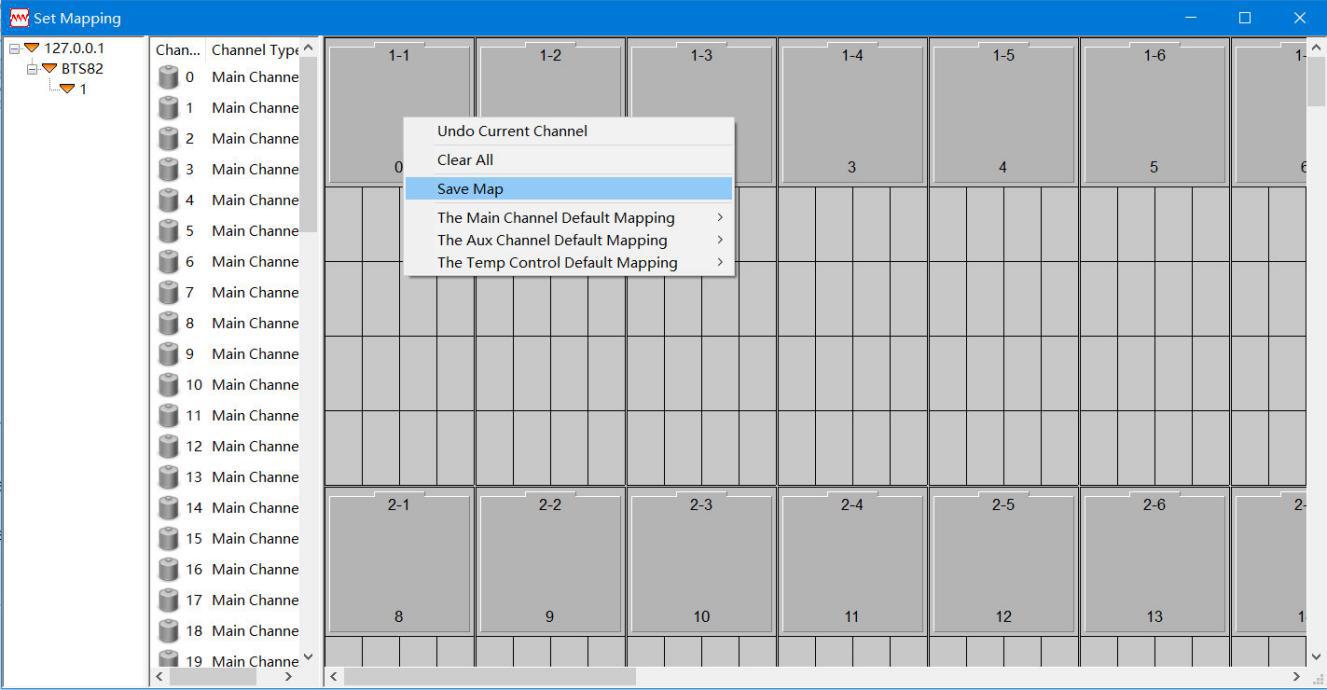
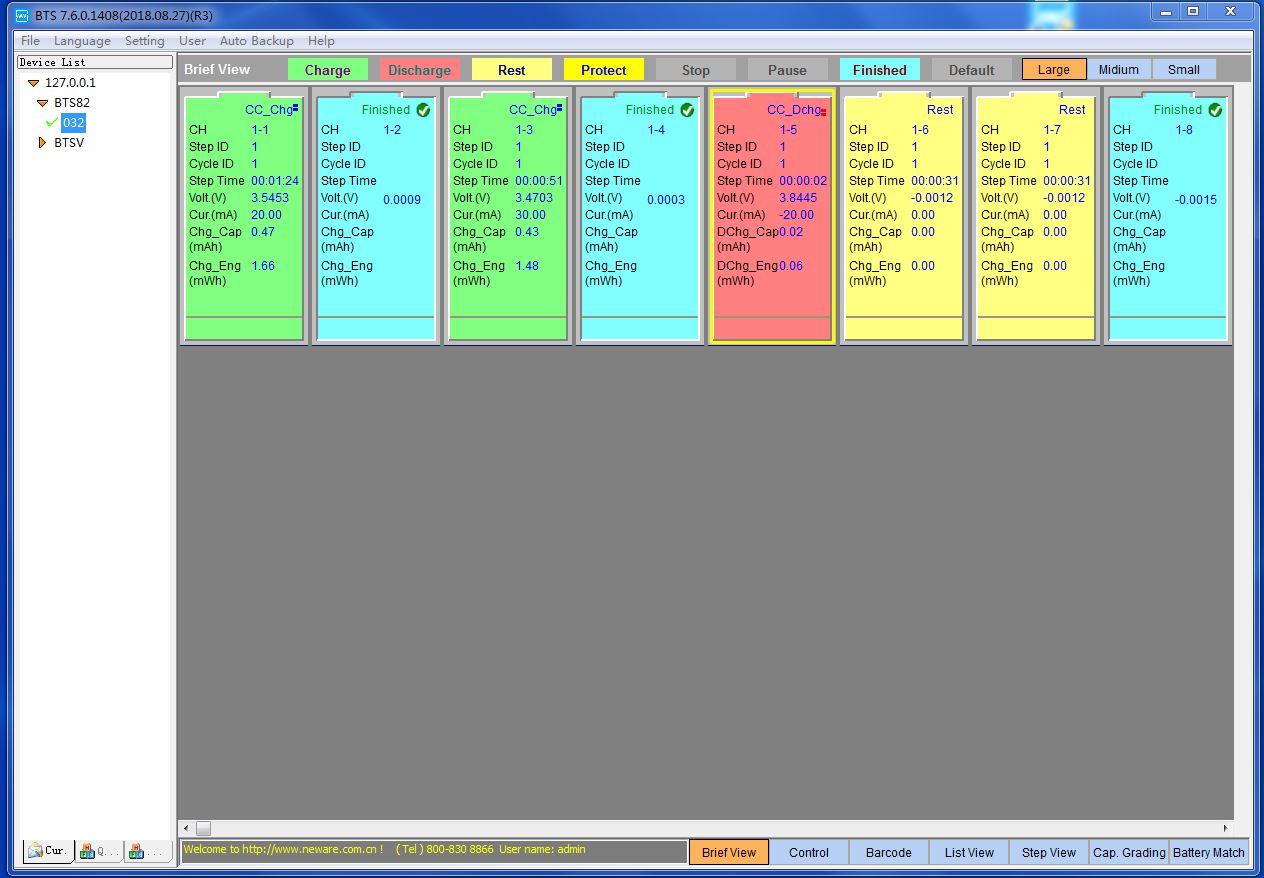
When you see all the channels in the software, then you can right click on any of the channels to start up a test.
You can tell the server setup is exactly the same as when you use only one computer(install server and client on one computer) to manage Neware testers.
#2. Setup the client(s)
Comparing with server setup, client(s) setup is easy and quick. All you need to do is to install the client software on your computer, then set up the correct IP address of the BTS.ini file, then everything’s should be OK.
On your client computer, download the newest software from following address(or copy it from a USB flash drive if you already downloaded it and save it on a USB),
https://newarebattery.com//softwares/NEWARE_BTS7.6.0_2017_08_04_En.exe.
Right click on above installation package and run it as administrator.
Install VC++ library and Client(uncheck the Server, this is important, we need to be sure in your LAN, only the server computer runs the BTS server).
After the installation, run BTS7.6.0 from your desktop(this is to generate the BTS.ini file).
Open the BTS.ini file, usually it’s in the folder ‘c:\Program Files (x86)\NEWARE\BTSClient7.6.x\BTS.ini’.
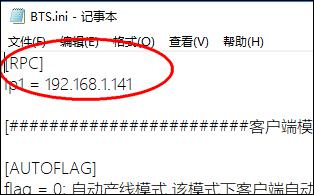
At the very beginning of the BTS.ini file, there are lines like:
[RPC]
ip1 = 127.0.0.1
Change ip1 from 127.0.0.1 to IP address of the server computer, let’s say the sever IP address is 1.1.1.88, then change ip1=127.0.0.1 to ip1=1.1.1.88.
Save BTS.ini file(you may need administrative rights to do it) and restart BTS client.
#3. How it works in reality
Let’s see how the distributive setting works in reality.
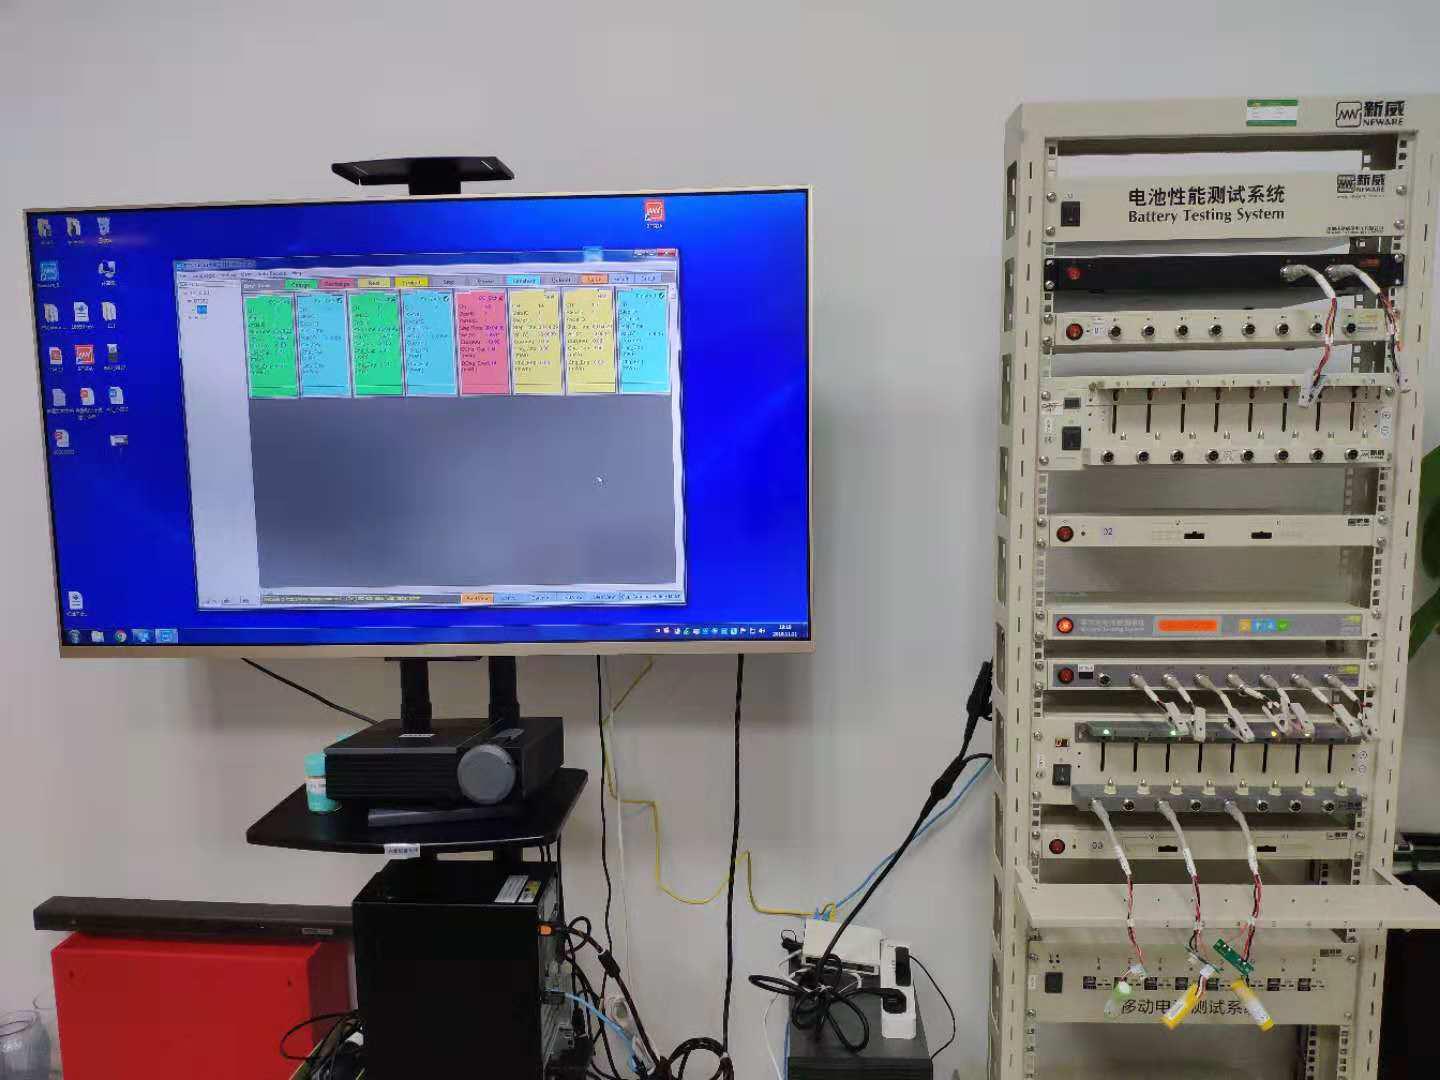
Test Room:
Where’s the server computer and testers located.
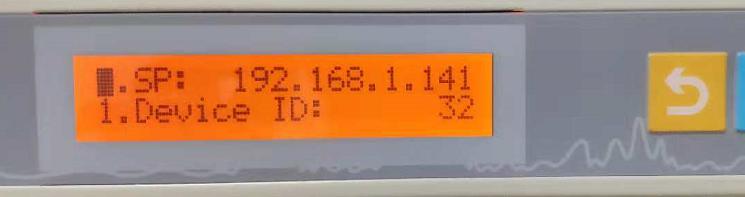
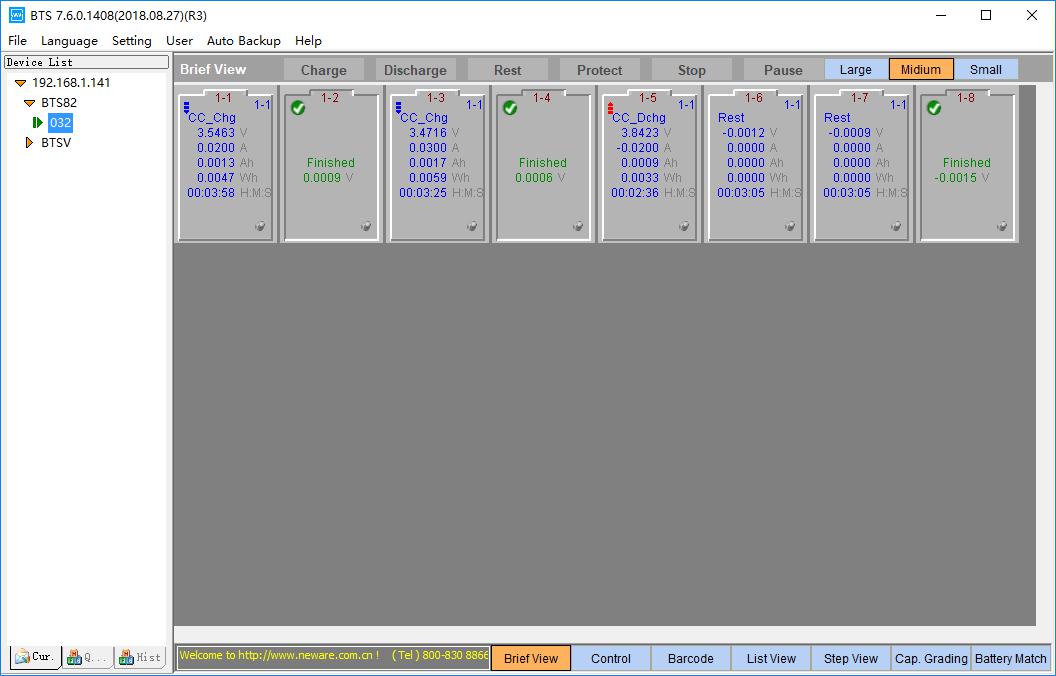
This is the server computer(IP of it is 192.168.1.141), which means we should set up the SP of the mid machine to 192.168.1.141, it shows on the small screen of the mid machine, looks like the picture below.
We connect some batteries on the channels and start up the test, this is what we see from the server computer.
In the device List, the IP showing is 127.0.0.1, it means this computer itself is the server.
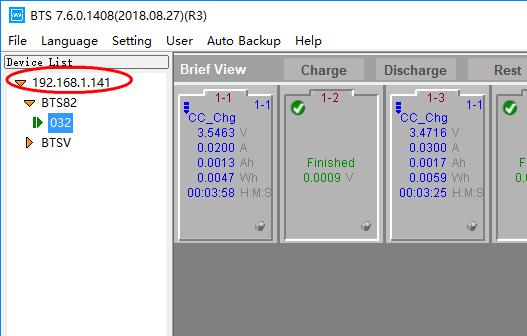
Client/User A:
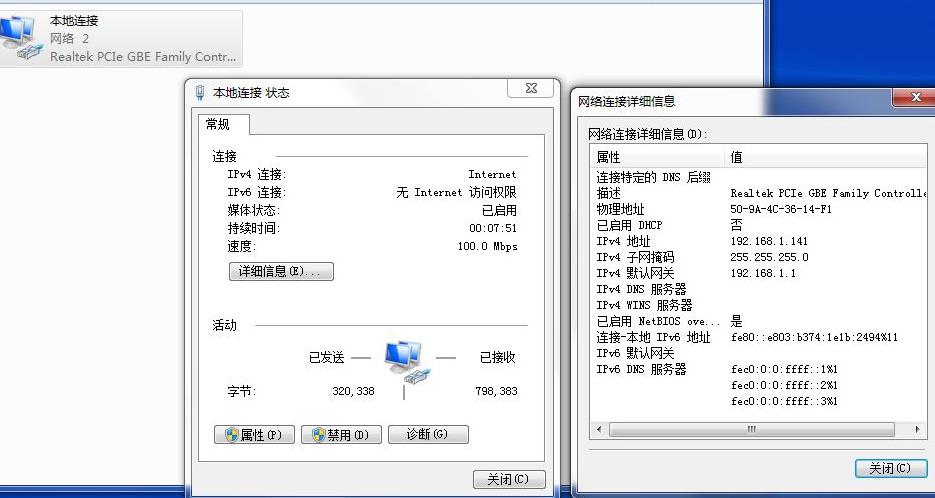
User A could be anyone in the office/lab, the computer he’s using is in the same LAN as the server, BTS client already installed, and the BTS.INI has been changed to as shows here:
In the device List, the IP showing is 192.168.1.141, that’s the server IP, which means this client computer connects to the server computer.
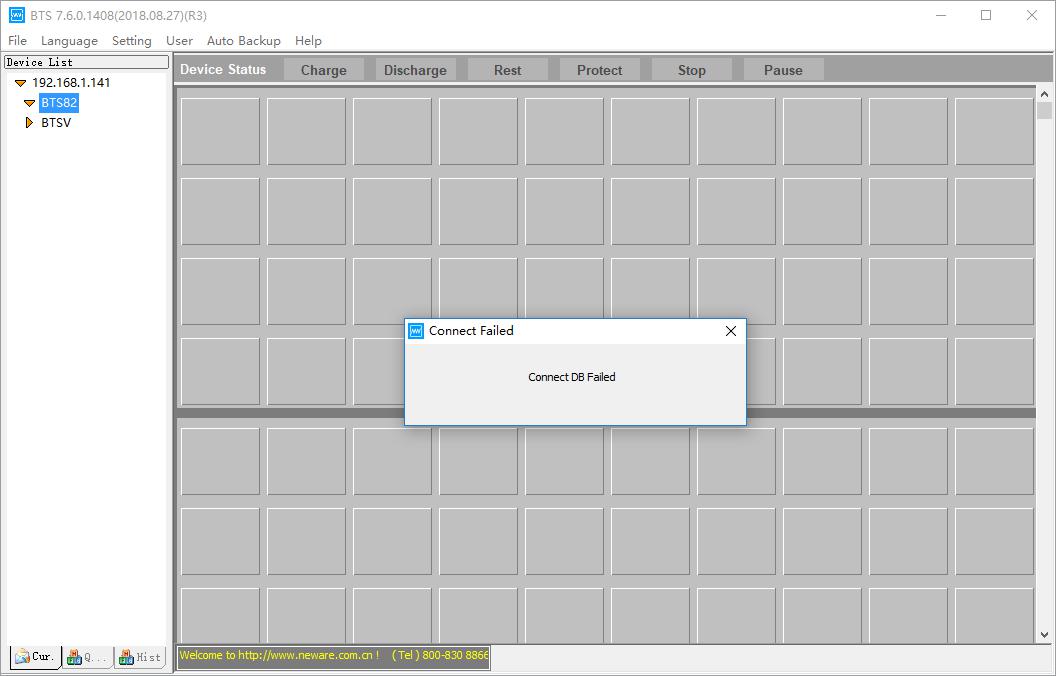
And when the server is powered off or disconnected, other client users will get following error.
Comments are closed.


