Neware BTS4000 series equipment is so stable, reliable with everyone affordable price, many customers even call Neware BTS4000 battery cyclers, though in fact BTS4000 is capable of far more than cycling.
If you got a Neware BTS4000 on hand, it’s very possible that you are going to use it mainly for battery cycle-life test, right?
Cycle life test is a traditional way to simulate the battery service life time in reality life.
Neware BTS software is easy and intuitive to use. Let us show you how to create a typical cycle-life test recipe/profile in BTS4000 software.
Let’s assume you’ve already installed the BTS software on your computer, and the software/computer recognized the testers successfully. Don’t know how to set up the connection? Please follow the instruction here firstly and then come back when you made it.
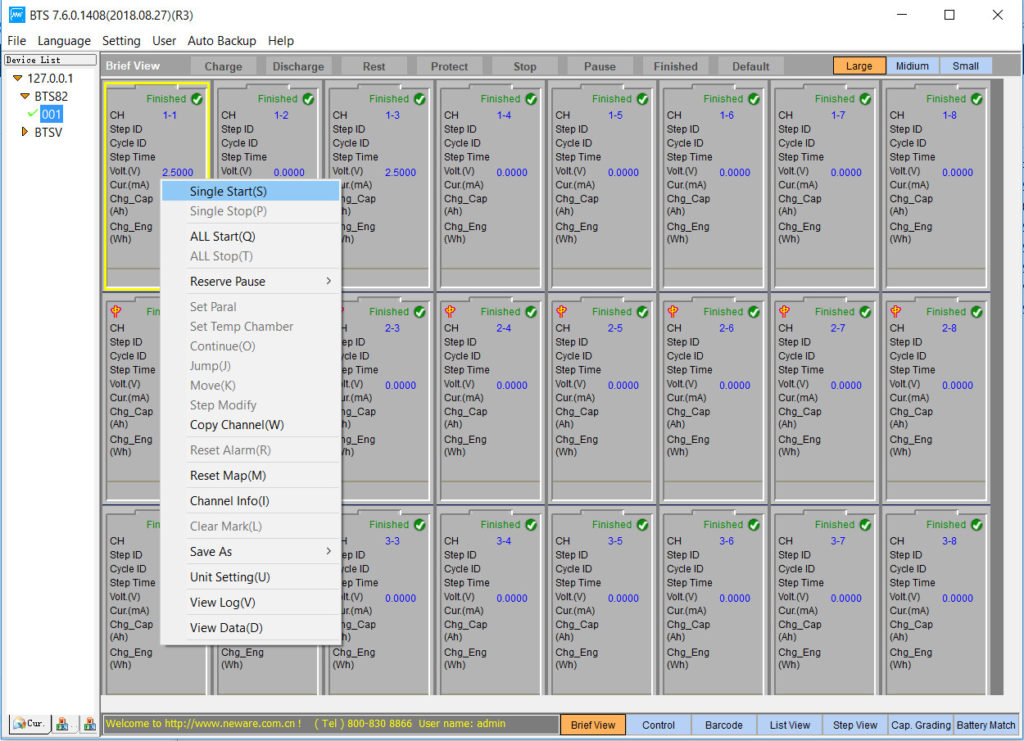
Let’s explain a bit of above screenshot. You can tell there are 4 parts we labelled out.
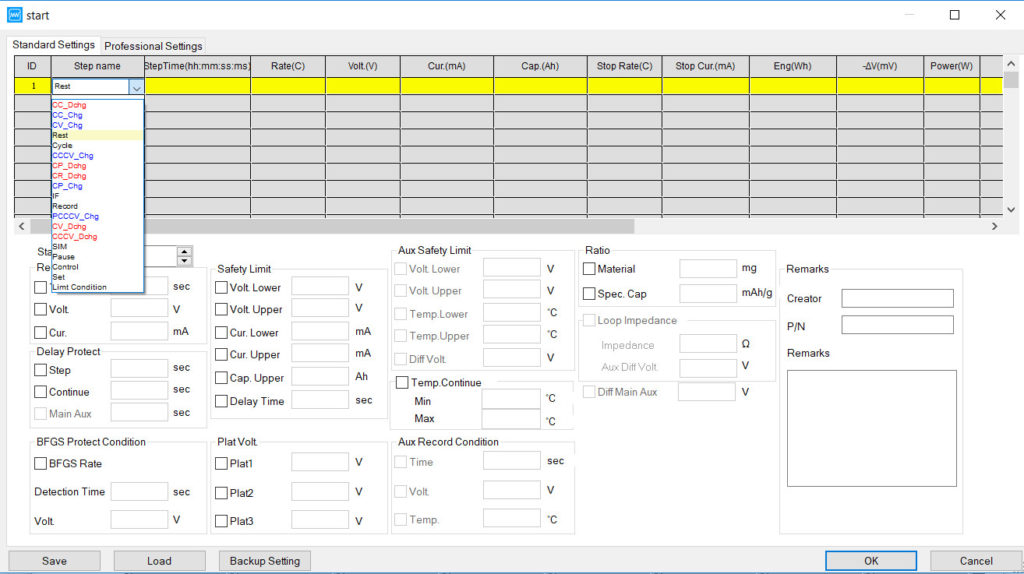
Part 1. This is the place you create the test process, choose a step type and set up the parameters according to your requirement.
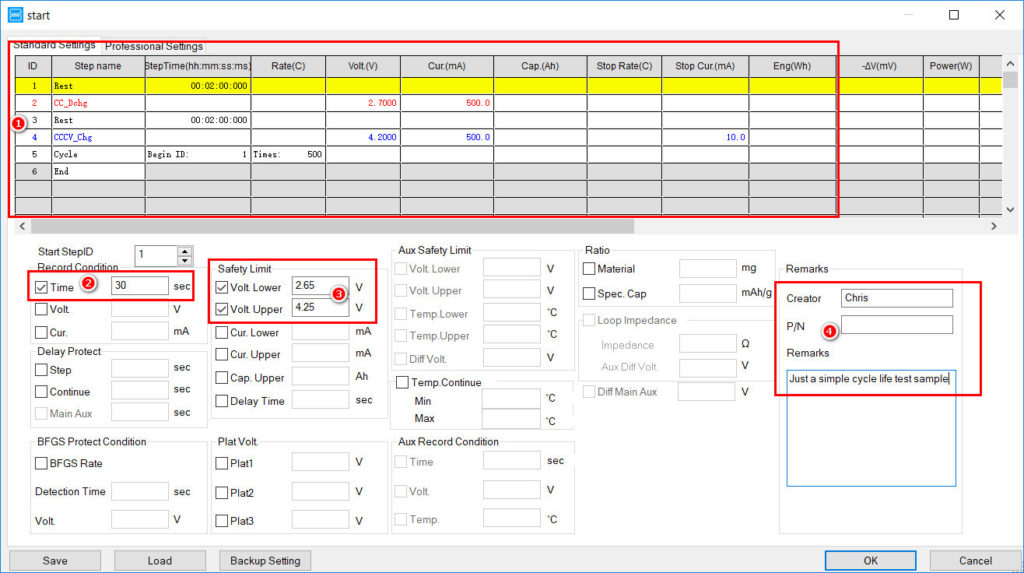
There are 6 steps of this cycle life test:
Step 1: Rest the battery for 2 minutes, it’s totally up to your requirements, some customers would rest the battery for 5 minutes or even longer time;
Step 2: Use 500mA constant current to discharge the battery until the voltage of the battery is equal or lower than 2.7V.
Step 3: Rest the battery for another 2 minutes;
Step 4: Use CCCV(constant current and constant voltage) to charge the battery. This is how this step will work: firstly, the battery will be charging in 500mA constant current mode until the battery reaches 4.2V, then charging mode will be switched from constant current to constant voltage, which means the battery will be continuously charging but the voltage won’t rise any more, instead of the incoming current becomes less and less, until the incoming current is equal or less than 10mA(0.02C), this second half charging stage is what we call stream charging, it can make sure the battery will be fully charged;
Step 5: Redo(repeat/cycle) above 4 steps 500 times;
Step 6: End. Above 5 steps will run for 500 times then the whole process is complete.
Down there, there are parts 2, 3 and 4 with circled number. We’d also explain them a bit.
Part 2: Time interval, this is the data record interval/frequency, here it’s 30 seconds, which means the data will be saved every 30 seconds, for cycle life test, we’d suggest 30 seconds, 60 seconds or even longer time.
Part 3: Voltage low and high boundary/limitation, this is for safety, to be sure the battery will not be overcharged or over-discharged, once the voltage of the battery is lower than 2.65V or higher than 4.25V, then the test will be paused automatically from further possible damage to the battery.
Part 4: You can input something here, such as the test creator or the remarks, these information could be very helpful when you want to find some tests you’ve done before in many historical results.
This is pretty easy, right? And you can download above cycle life test recipe and try it on your own tester.
What a typical cycle life test data looks like? Here it is.
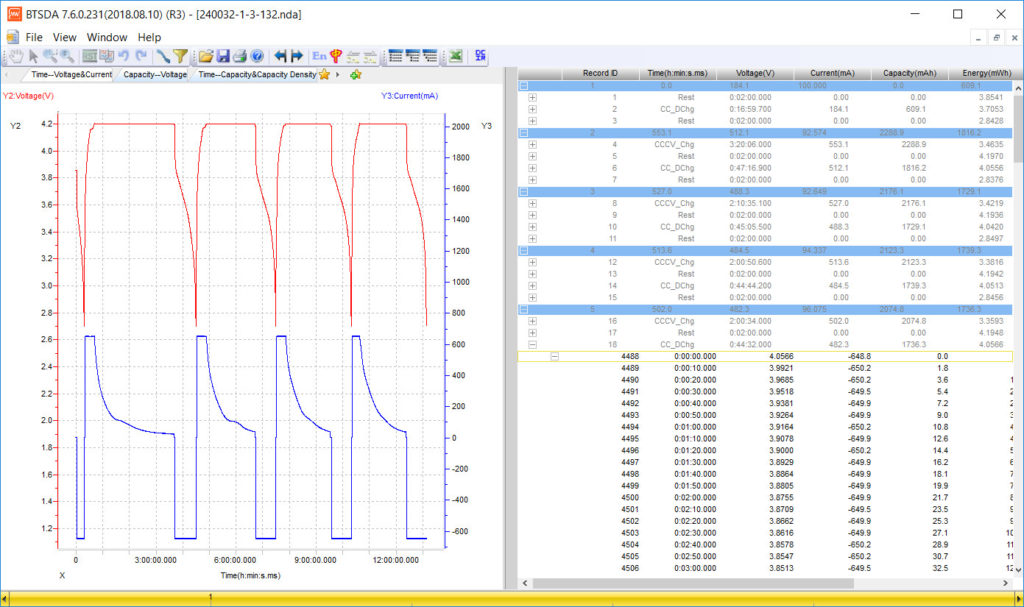
The curve is pretty beautiful, right? Don’t know how to read/analyze the testing result data in Neware BTSDA? Please watch the BTSDA video clips we made for you.
Comments are closed.


